Adding comments to my Astro blog using Netlify Forms
I’ve been using utterances on my programming blog for quite a while now, and wanted to add a comments section on my hiking blog as well. However utterances needs a Github account, which I didn’t really think that made sense for readers of my hiking blog. So instead I settled on a combination of Netlify Forms and Zapier.
When it comes to adding comments to your blog, there are other alternatives out there like GraphComment and Disqus. They tend to have more of a fixed design, so although it’s a hassle, I wanted to build my own so it more seamlessly integrates with the design of my site. My set-up with Zapier isn’t quite perfect - it’s not really an automated process, but it’s simple enough that it works for me.
Adding a Netlify Form to your Astro site
What originally inspired me to use Netlify Forms to begin with was when I stumbled upon Rach Smith’s blog post about using Astro with Netlify Forms. (As a side note, I love her blog’s design as well).
If you’re hosting your site with Netlify, basically they have a free feature where you can set up custom forms that Netlify will capture the responses of. Their docs go through the setup process. I use React together with Astro, so my Forms component looks something like this:
import { useState } from 'react';

export const Form = () => {
  const [isSendingForm, setIsSendingForm] = useState(false);
  const [hasSentComment, setHasSentComment] = useState(false);
  const [hasError, setHasError] = useState(false);

  const handleSubmit = (event) => {
    event.preventDefault();
    setIsSendingForm(true);

    const myForm = event.target;
    const formData = new FormData(myForm);

    fetch('/', {
      method: 'POST',
      headers: {
        'Content-Type': 'application/x-www-form-urlencoded',
      },
      body: new URLSearchParams(formData).toString(),
    })
      .then((data) => {
        if (data.status === 200) {
          setHasSentComment(true);
        } else {
          setHasError(true);
        }
      })
      .catch(() => {
        setHasError(true);
      });
  };

  return (
    <>
      {hasSentComment && <i>Thank you for your comment!</i>}
      {!hasSentComment && (
        <>
          <form
            id="comment-form"
            name="comment"
            method="POST"
            data-netlify="true"
            netlify-honeypot="url-field"
            onSubmit={handleSubmit}
          >
            <input
              type="hidden"
              name="form-name"
              value="comment"
            />
            <p>
              <label htmlFor="name">Name</label>
              <input
                type="text"
                name="name"
                required={true}
              />
            </p>
            <p className="hidden">
              <label htmlFor="url-field">URL</label>
              <input
                type="url"
                name="url-field"
                id="url-field"
              />
            </p>
            <p>
              <label htmlFor="comment">Comment</label>
              <textarea
                name="comment"
                required={true}
              />
            </p>
            <p>
              <button
                type="submit"
                disabled={isSendingForm}
              >
                Send
              </button>
            </p>
          </form>

          {hasError && <i>Comment didn't send.</i>}
        </>
      )}
    </>
  );
};
The code example is a bit long (sorry!) since I’ve added in a couple of extra things like error handling. But the key things you need to get this Netlify Forms working with Astro are:
- A
data-netlify="true"attribute in the form. - A hidden input named
form-name, with a value that matches the name of the form. Netlify uses this to identify the form. - The form needs to be present at the time the page loads. Astro has some unique features to improve the performance of your site like Islands which delay rendering of components, but you’ll have to make sure your form is visible as soon as the page loads.
Also optionally, but recommended, is including a honeypot field which is marked with the netlify-honeypot="url-field" attribute. You can hide this field using some display: none; CSS from your users, but bots will still attempt to fill it out. This way, Netlify can catch and stop any bots that are trying to submit spam to your site.
Unfortunately I didn’t find this completely worked, and I have gotten two spam comments so far. Luckily they both linked out to the same site so I just added some logic to not send the form if the comment contained that website. That seems to have shut them up.
if (
    spamDomains.some((domain) =>
        formData.get('comment').includes(domain),
    )
) {
    setHasError(true);
    return;
}
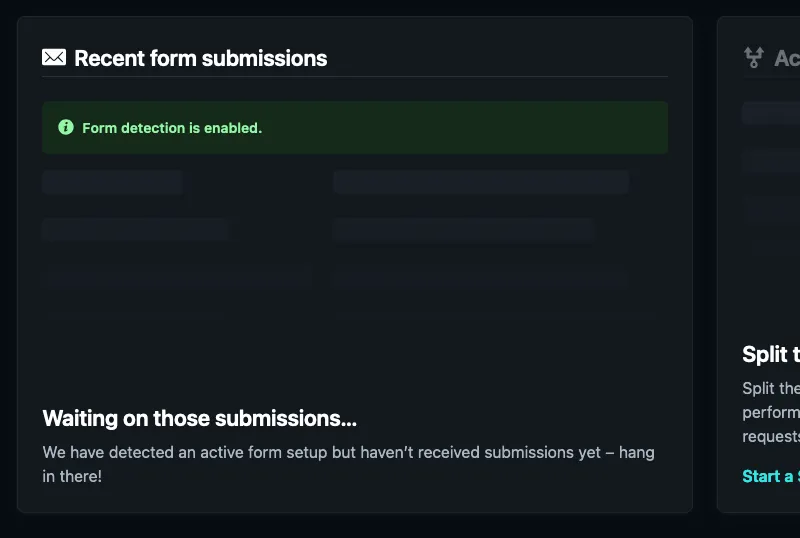
Once you have pushed and deployed your new form, you will need to enable form detection via the Forms page in your Netlify UI. Once Netlify has detected that your form exists, you should see it on your site overview page like the following:
Send a test comment to your Netlify Form
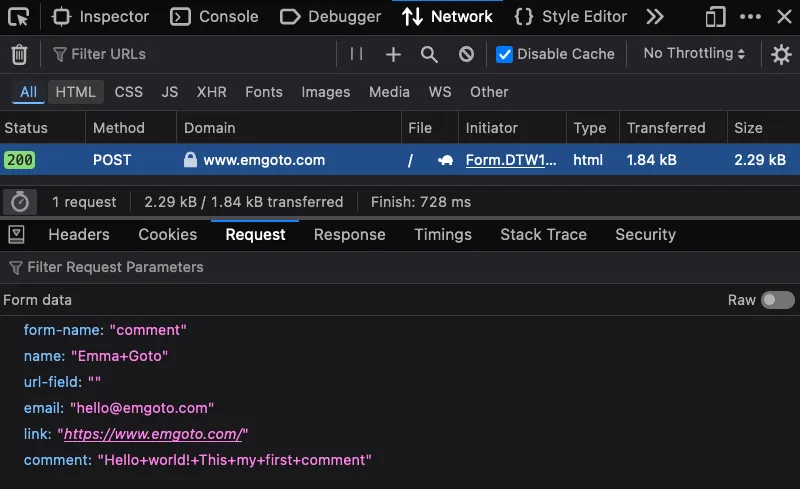
Now that you have a form, you can send a test comment. You’ll need to do this on the Netlify-deployed version of your site, and not your local dev instance. You can take a look at the network tab when you click your form’s submit button, and verify that it is correctly sending through the form with the data that you are expecting:
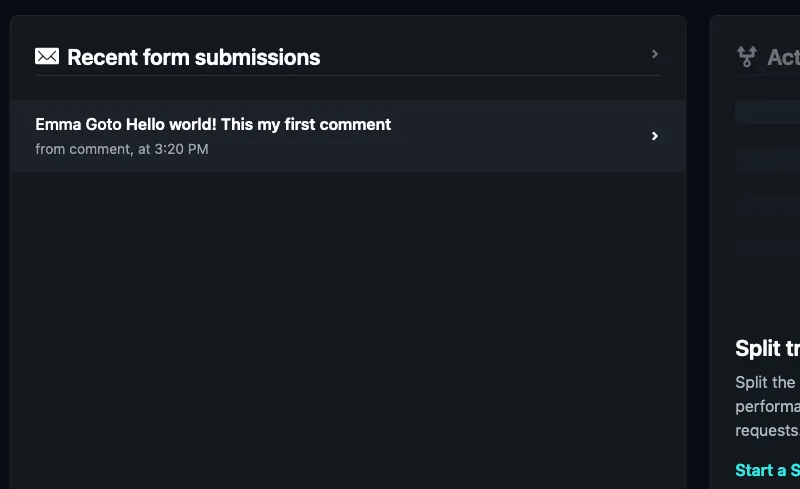
Now if you head back to your Netlify UI and refresh the page, you should be able to see your form submission:
Integrating with Zapier to raise Github issues
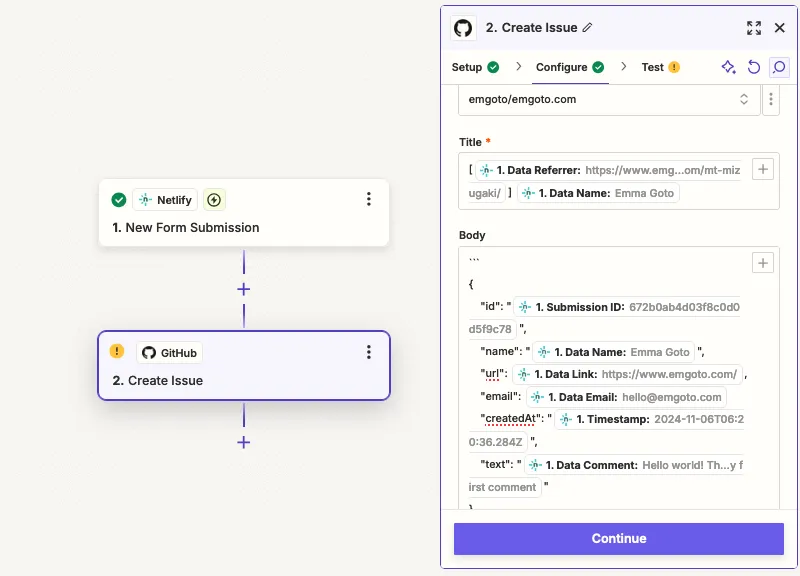
So once you have a Netlify Form working, the next problem you have to solve is how you get this comment onto your blog. I have a Zapier integration set up to create a Github Issue on my website’s repository when the form is submitted.
Storing my comments in a JSON file
When Zapier creates a Github issue, it looks something like this:
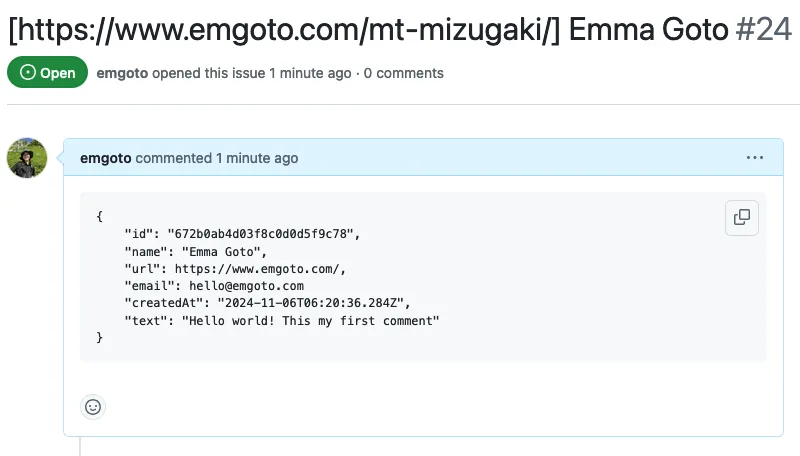
Since I have the Zapier set up to return the comment in a JSON format, it makes it easy for me to copy-paste it into the comments section of my repo. I have 1 file per blog post, so for example if I was to receive a comment on this page (/astro-blog-comments) I would add it to a JSON file inside of src/contents/comments/astro-blog-comments.json.
This copy-and-paste step is quite a manual solution, but with how infrequently I receive new comments, this feels simple and low effort enough that it works for me.
Setting up a contents collection in Astro
If you store things underneath the contents folder in Astro, you can make use of their content collections API. So first you’ll need to define a new collection for your comments:
const comments = defineCollection({
    type: 'data',
    schema: z.object({
        comments: z.array(z.object({
            id: z.string(),
            name: z.string(),
            url: z.string().nullable(),
            email: z.string().nullable(),
            createdAt: z.coerce.date(),
            text: z.string(),
        }))
    })
});
Rendering my comments in Astro
Then, wherever you define your comments component, you can grab all your comments for a specific blog post:
const getComments = async () => {
    const commentFiles = await getCollection('comments');
    return commentFiles.find(file => file.id === slug)?.data.comments || [];
};

const comments = await getComments();
And then loop through the list and render it as you see fit! (I’ll leave that as an exercise for the reader). And that’s the basic flow of it.
I’ll just go over a couple more gotchas and things I learned when setting this up.
Preventing a page refresh when you submit the form
You’ll notice that when you submit the form, the default behaviour is a full page refresh. This jumps the user to the top of the page, which is not ideal as they won’t know if their comment successfully submitted or not. In my case, I wanted the comment form to disappear, and a success message to appear.
To prevent the page reload, you’ll need to add a preventDefault to your submit handler:
const handleSubmit = (event) => {
  event.preventDefault();
If you refresh the page after sending a comment, you’ll also notice that the text in the input field will still be there. You can manually make the form reset after the it has successfully submitted with the following:
useEffect(() => {
  document.getElementById("comment-form")?.reset();
}, [hasSentComment]);
Accessibility when submitting a form
With the above fix to prevent a page refresh, you will be able to visually see a success message, but this may not be apparent to screen reader users. One easy fix would be to instead navigate to a separate page that lets users know that the comment was submitted.
If you did want want to keep users on the same page, unfortunately from Googling, I couldn’t find an official “best solution” or recommend way of solving this. But I do think a ARIA live region will work. If you wrap it around the success message, when the success message dynamically appears, it will also be read out for screen reader users:
<div role="region" aria-live="polite">
  {hasSentComment && <i>Thank you for your comment!</i>}
</div>
Note that with the way ARIA live regions work, you can’t do something like the following:
{hasSentComment && <div role="region" aria-live="polite">
  <i>Thank you for your comment!</i>
</div>}
As it’s specifically the content inside of an ARIA live region changing that will trigger the voiceover.
If you are on a Mac, Safari has the best screen reader support, so I recommend giving it a quick test when you implement it.
Using Gravatar to render avatars
I was also recently inspired by Brian Birtles’ Blog. He also makes use of Netlify Forms, but with the added genius idea of adding in a Gravatar integration, so that users can have their own avatars rendered. This was really easy to set-up:
import sha256 from 'crypto-js/sha256';

const Avatar = ({
  name,
  email,
}: {
  name: string;
  email?: string;
}) => {
  const hash = email ? sha256(email) : '';
  return (
    <img
      src={`https://www.gravatar.com/avatar/${hash}?d=mp`}
      alt={name}
    />
  );
};
Gravatar has an API where if you submit a hashed email address, you will get back the URL for their avatar. If the user didn’t submit their email address, or they don’t have a Gravatar account, you can use the default query parameter ?d= and pass in a default avatar URL if you have one. Alternatively by doing ?d=mp, it will return a generic grey avatar icon instead.
A final note on Netlify’s pricing system
Netlify Forms allows for 100 submissions a month on the free tier. Unfortunately, their pricing system is annoying in that if you go over the free quota, you will have to pay $19. They actually recently released a permanently free tier which removes this pricing issue, yay!
Checking out my comments section
So you can see what the form looks like, I’ve added the comment component directly to this blog post. Note that since it’s intended for my hiking blog, the CSS and styling may be a little weird and out of place here. I also do have a test comment at the bottom of my Mt Mizugaki post.
Comments
Leave a comment