- Elevation 2956m
- When to climb
Mountain stats
Mount Kisokoma-gatake (木曽駒ヶ岳, kisokoma-ga-dake) is one of Japan’s 100 Famous Mountains, and at 2956m, is the tallest peak in the Central (or “Chuo”) Alps in Nagano. With hiking courses as short as 3.5 hours, it is feasible as a day hike from Tokyo, even with public transport.
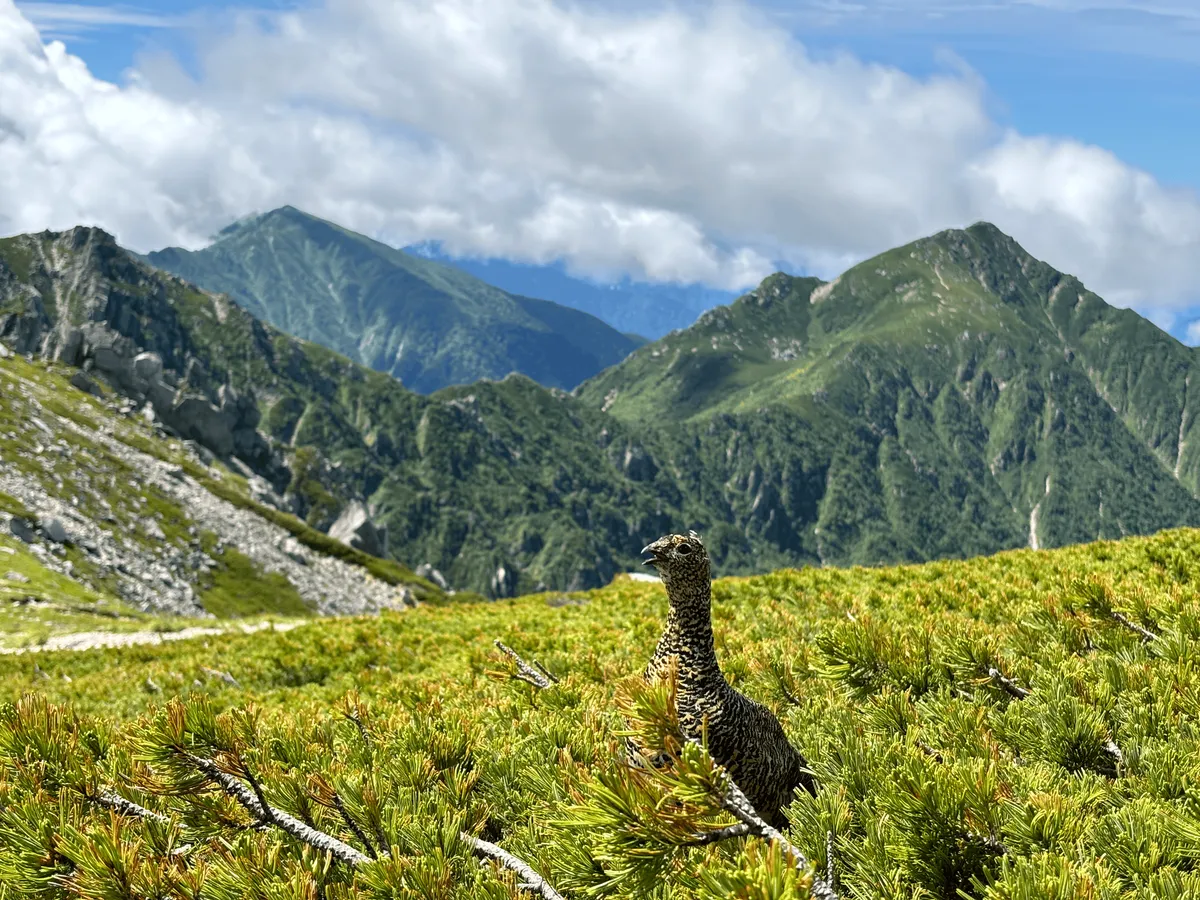
The Komagatake Ropeway will take you up to 2612m where you begin your hike (the highest elevation for a ropeway station in Japan) and provides a beginner-friendly way to get to experience the superb scenery of the Japanese Alps. And if you are lucky, you may even sight the Japanese rock ptarmigan (or “raichou”), which we fortunately did on our trip!

We hiked Mt Kisokoma-gatake at the end of July 2024, and the temperature as we got off the ropeway was a cool 18 degrees - half the temperature of Tokyo. However with the direct sunlight it was still quite hot.

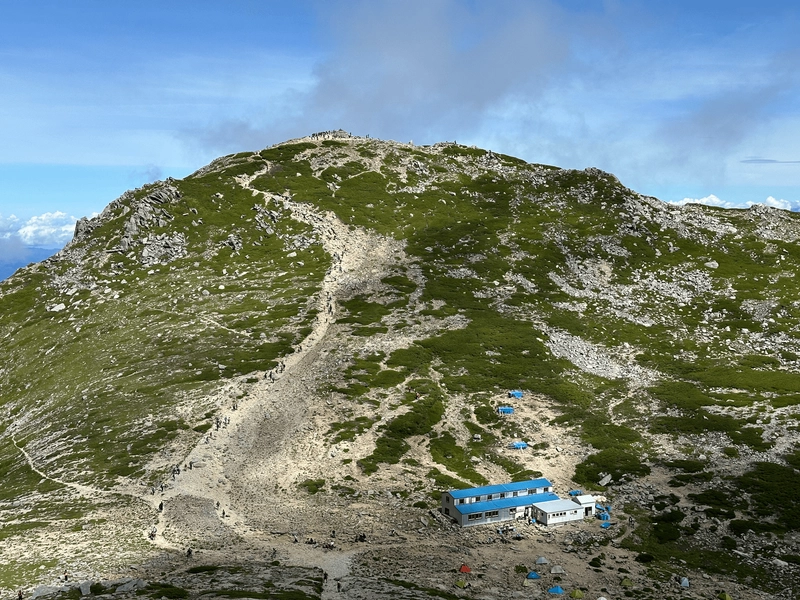
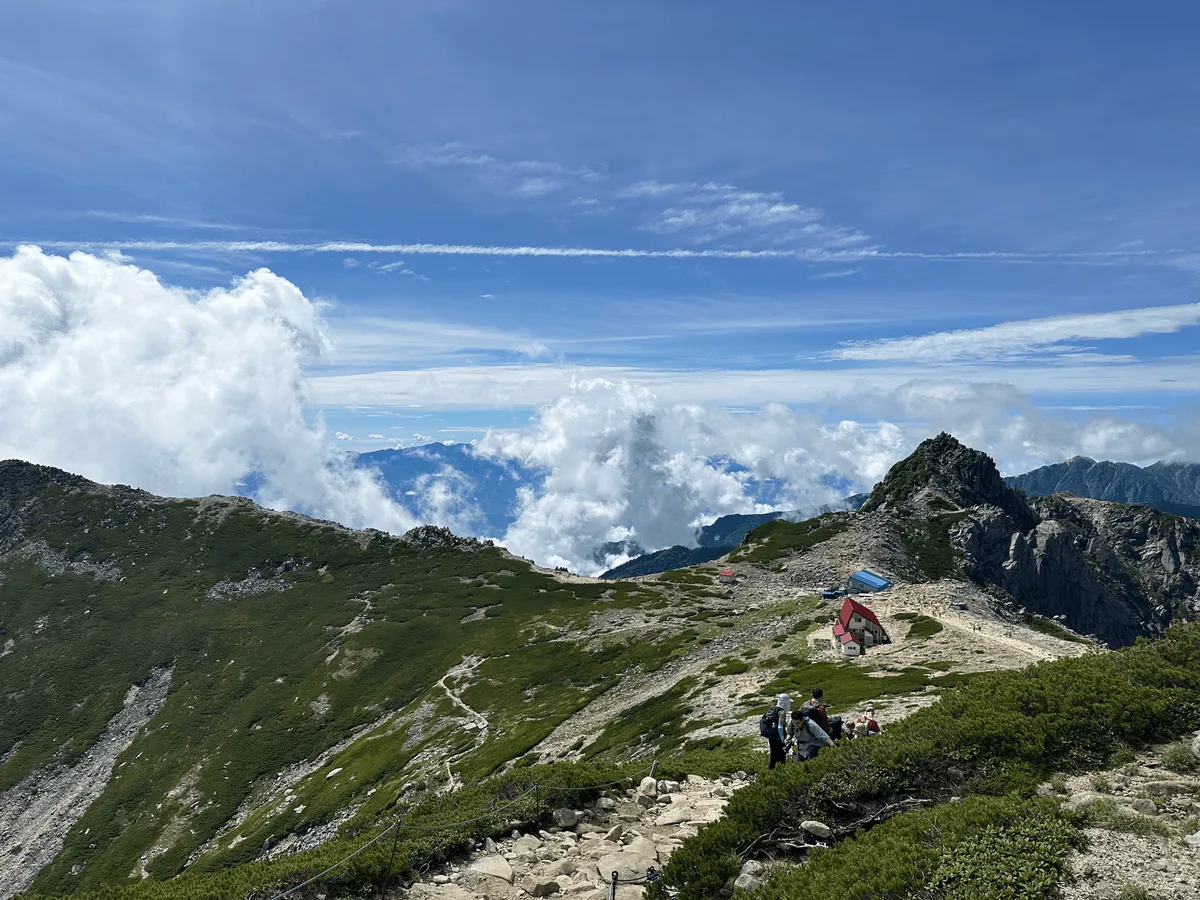
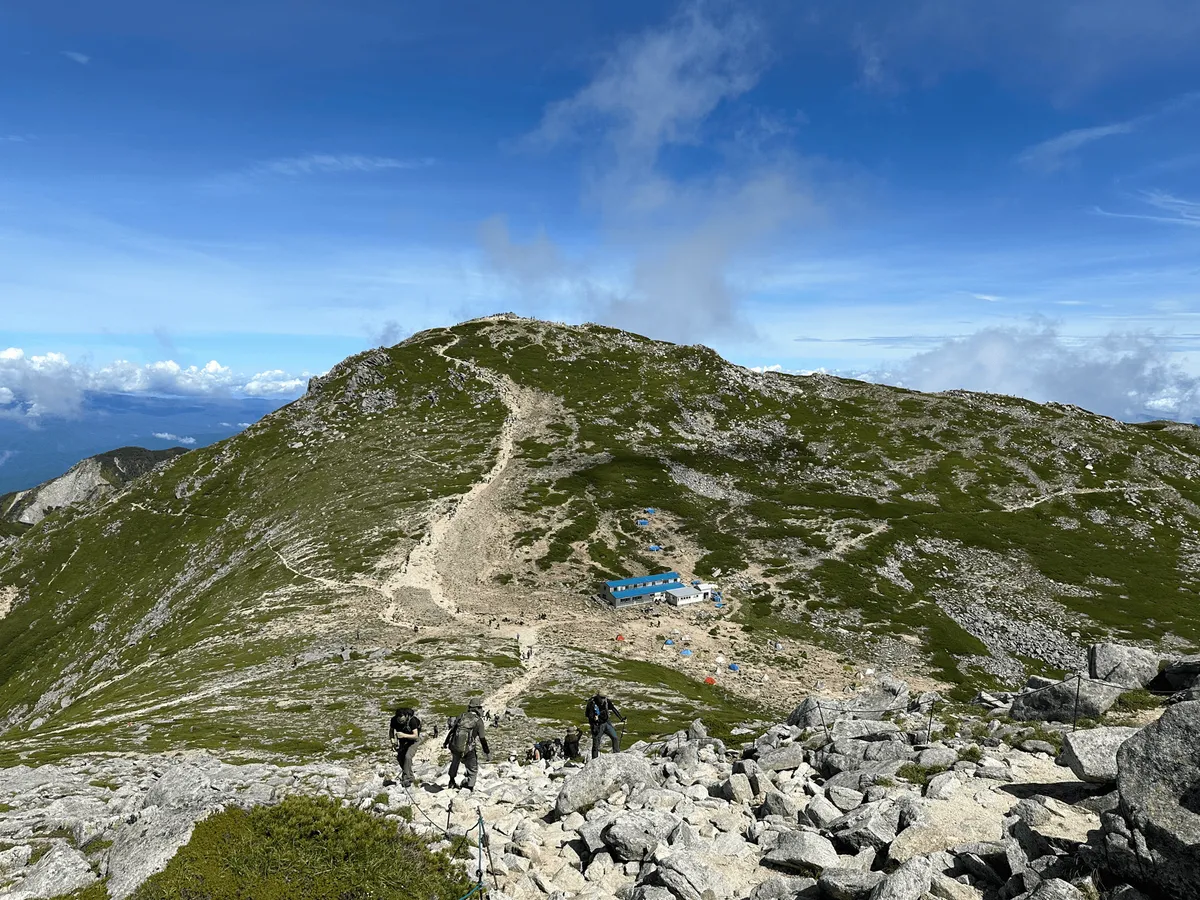
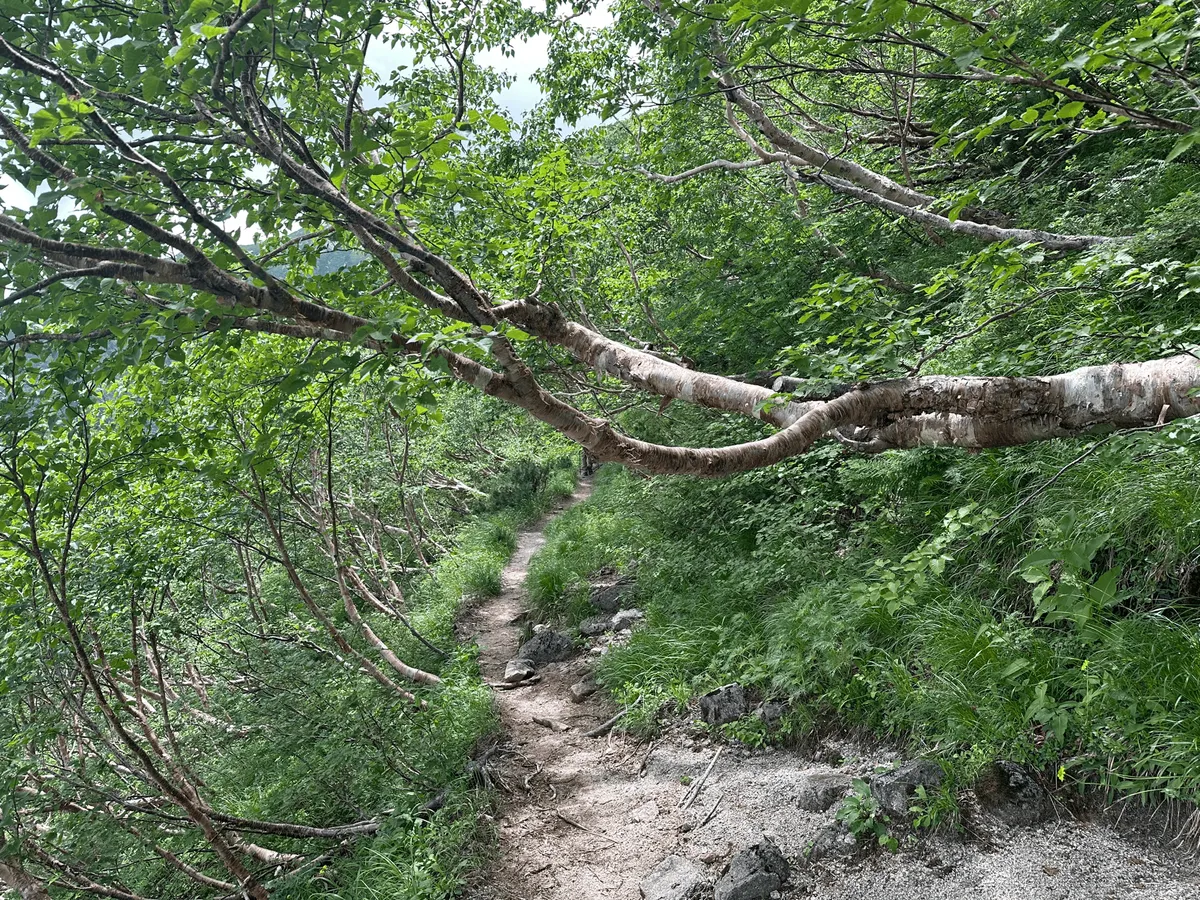
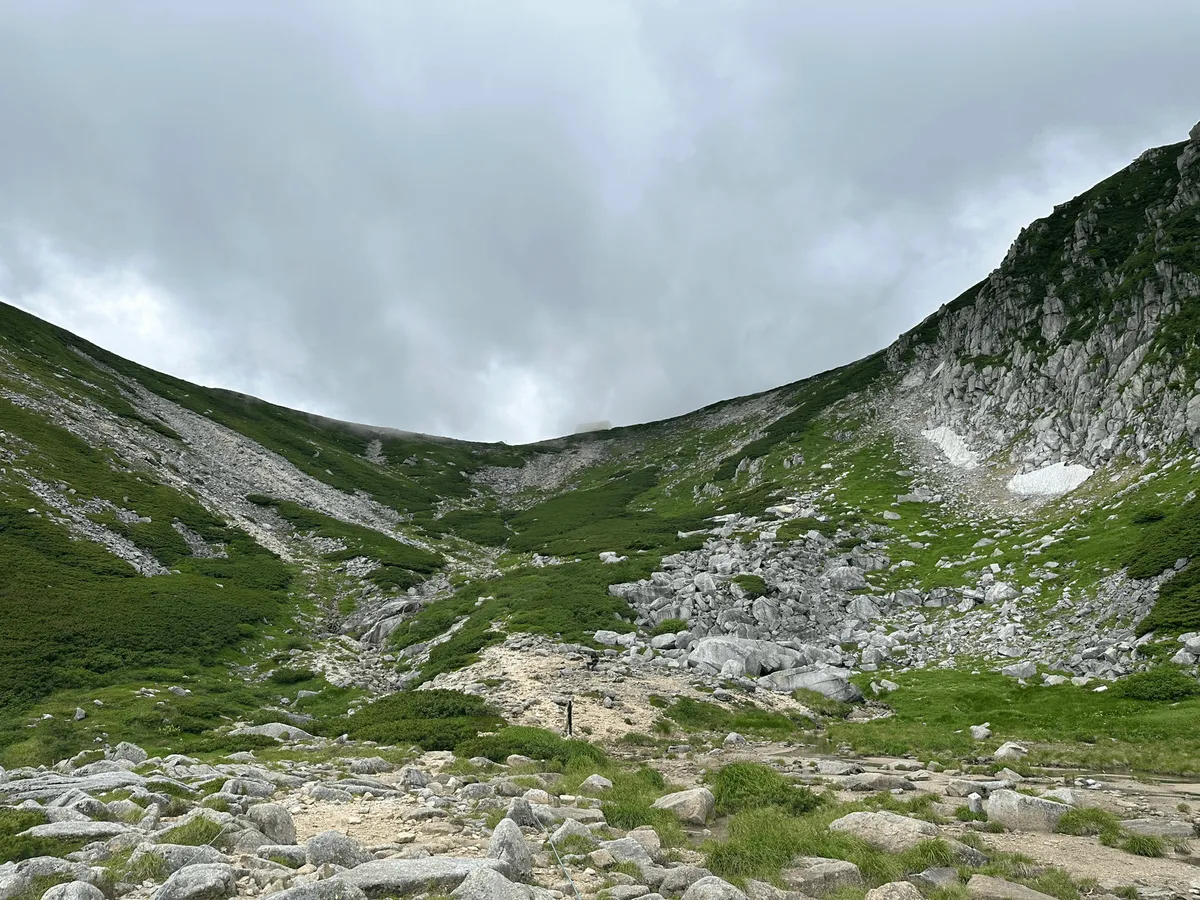
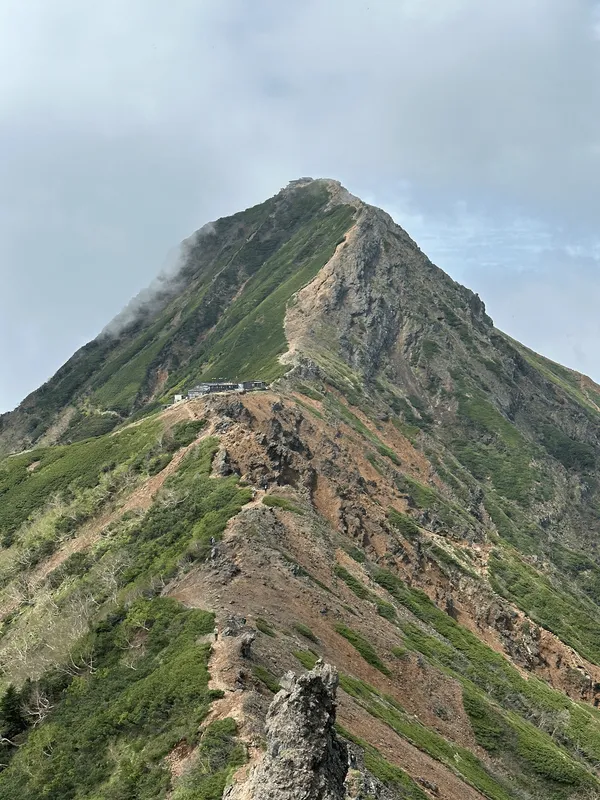
The trail begins with a 45 minute climb to the Hoken Sanso (宝剣山荘) mountain hut. This is named after the nearby Mt Hoken (宝剣岳, hoken-dake), a rather steep rock-face that you could occasionally see some brave-looking individuals standing on top of.

Once you reach the Hoken Sanso, it’s only 10 minutes to the first peak of the course, Mt Naka-dake (中岳, naka-dake). From Naka-dake you can see the main peak of Mt Kisokoma-gatake in the distance.
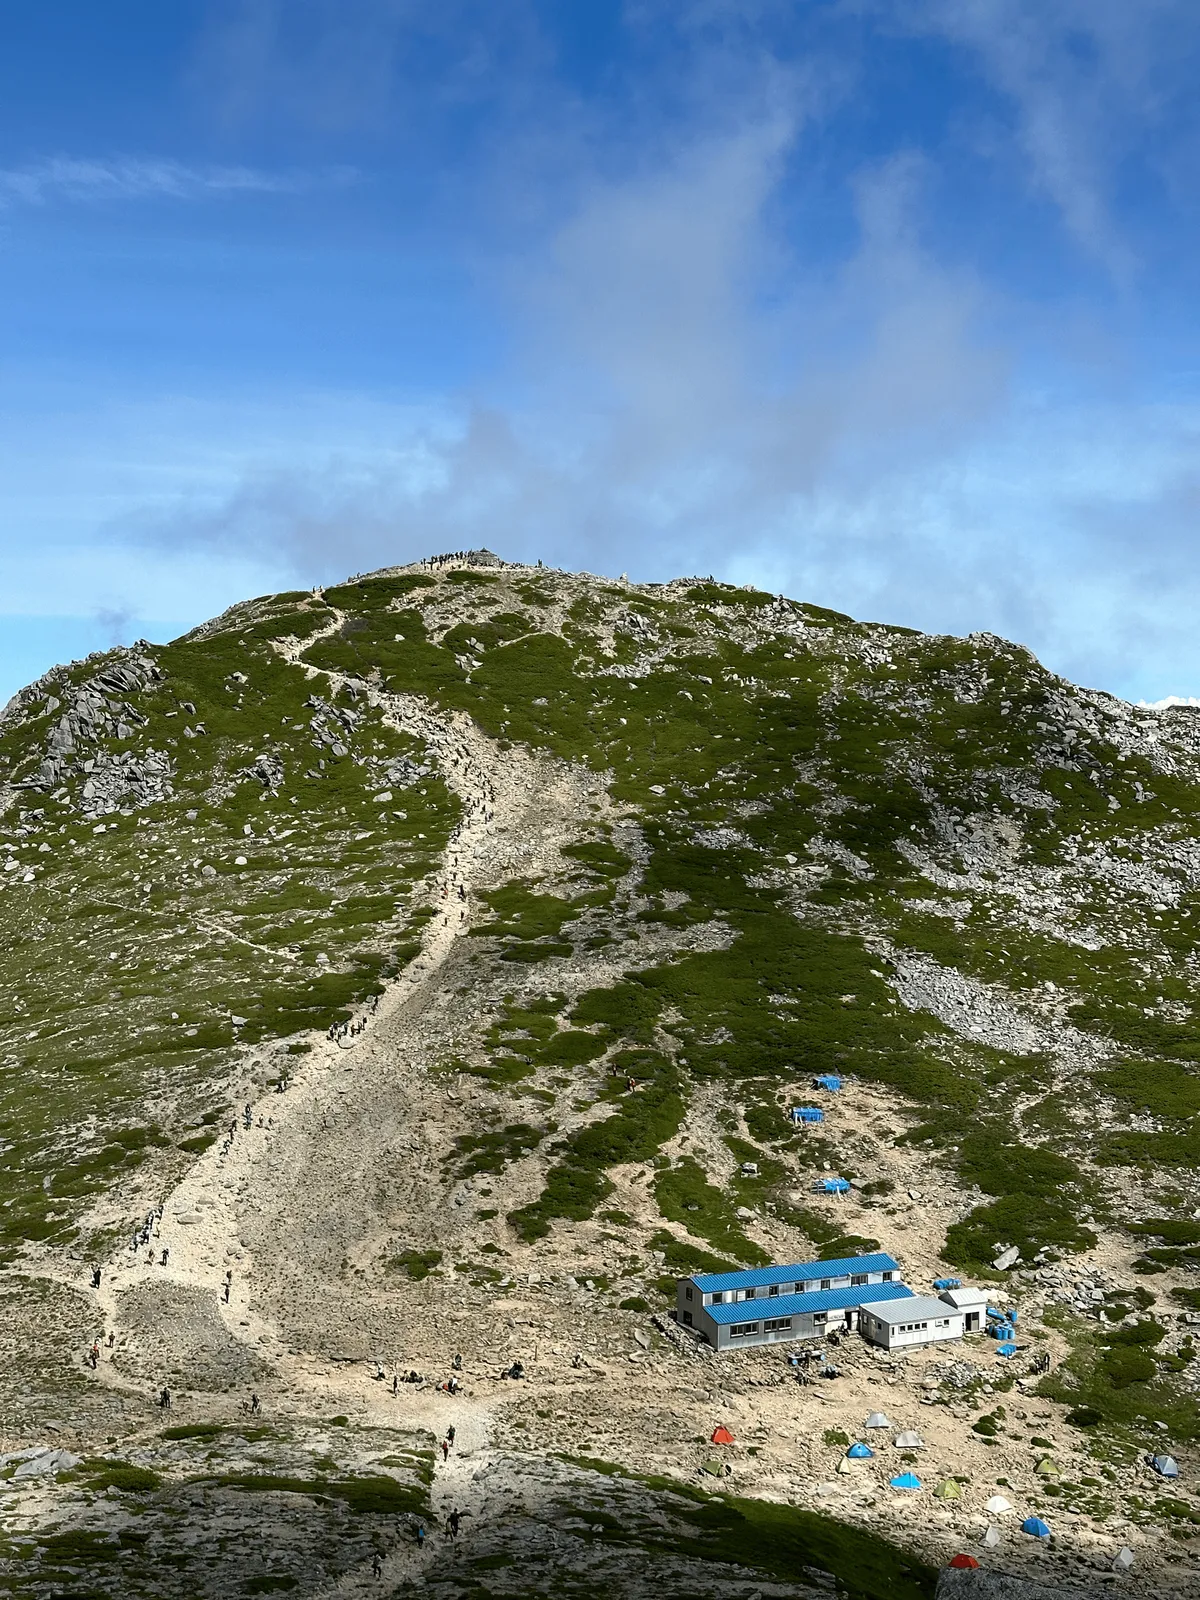
It’s a descent down to another mountain hut and tent site, before a climb up to the peak, and should only take you about 30 minutes.
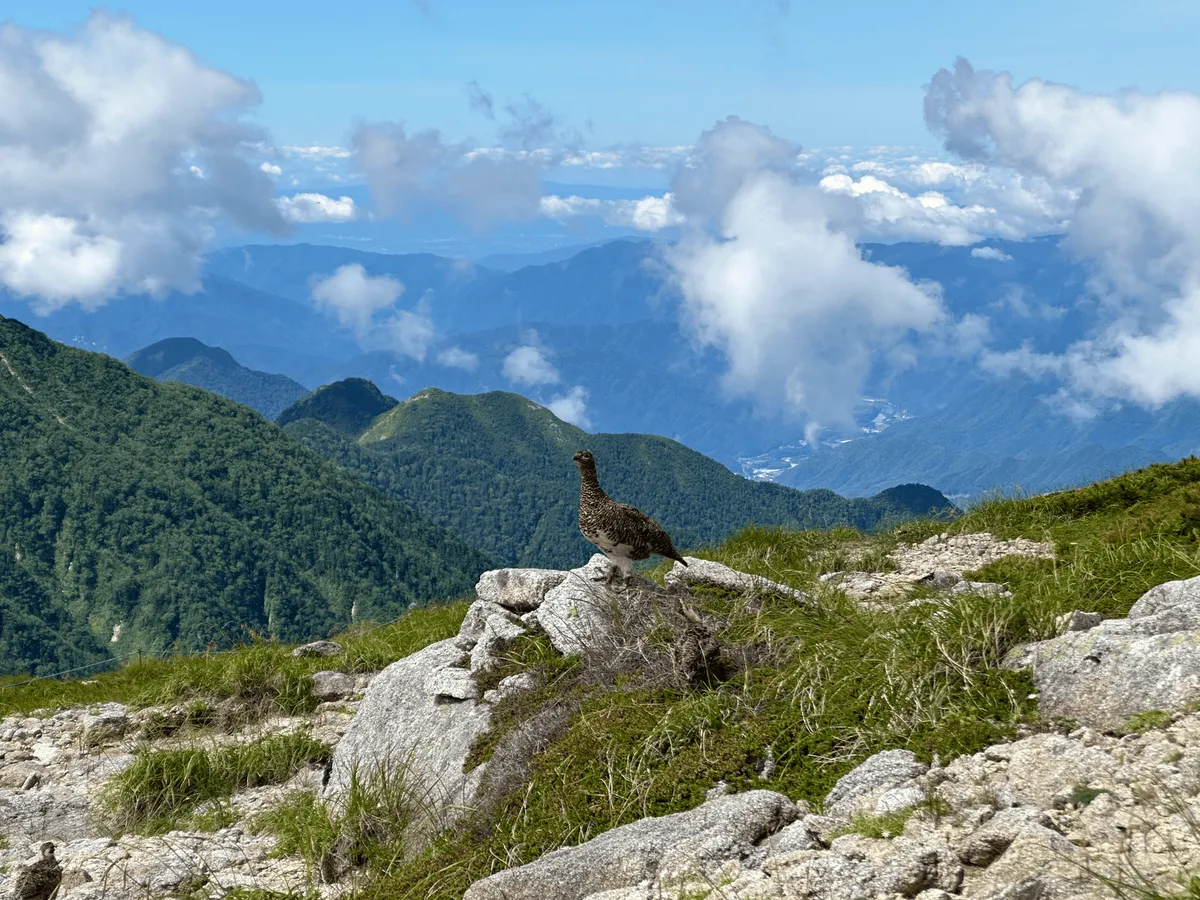
As well as climbing this 100 Famous Mountain, my other goal today was to see the iconic Japanese rock ptarmigan (雷鳥, raichou). These guys are a subspecies of the rock ptarmigan found in Europe and North America. They made their way to Japan during the last Ice Age 20,000 years ago, when there was still a land bridge between Japan and the Eurasian continent.
What makes them unique is that they are a bird that can only thrive in the cold, and so are only found in the high altitudes of the Japanese Alps.
As we started to descend from Mt Naka-dake, we spotted people in orange vests standing in the shrubs off the main mountain trail. At first we were pretty confused at what they were doing, but when we heard other hikers mention the raichou, we started to get pretty excited!
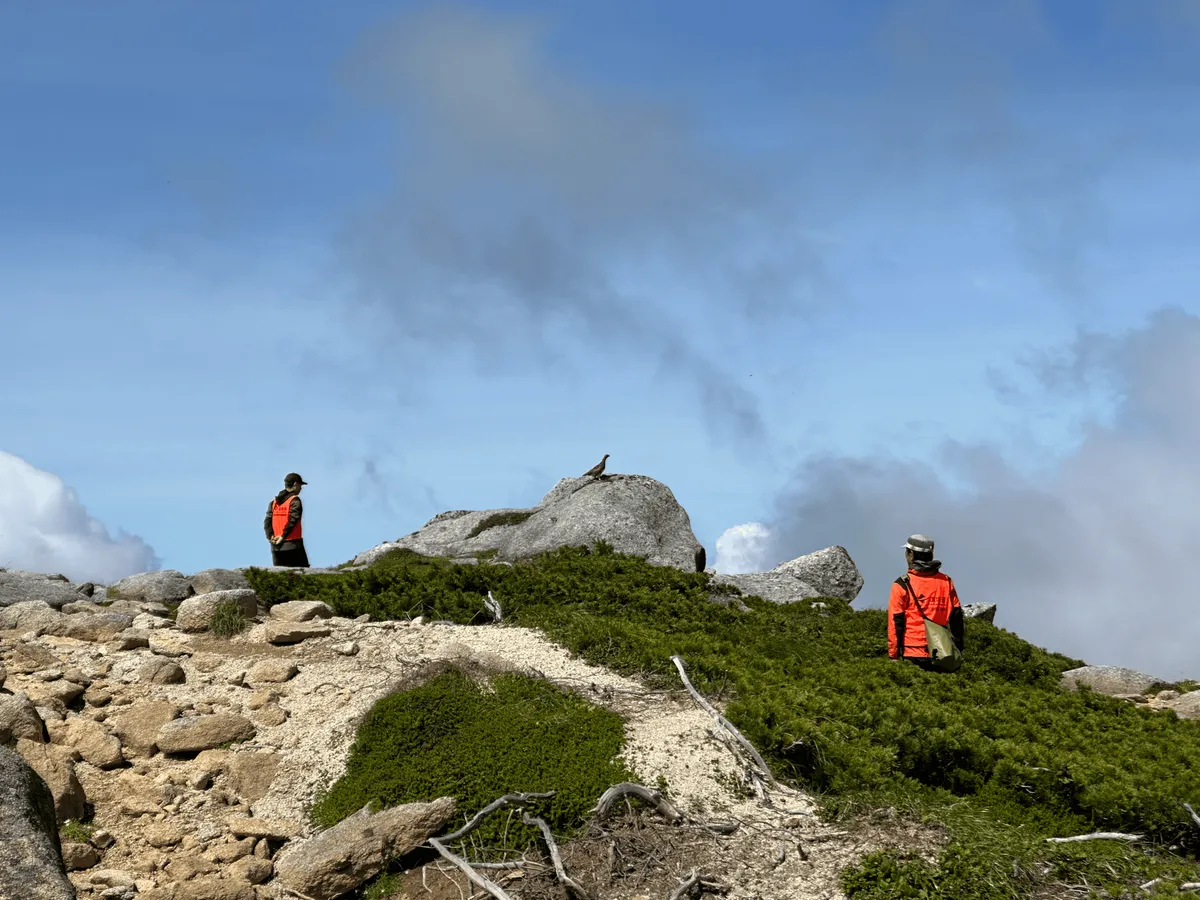


There were 3 separate mums and their chicks (so about 10 birds in total) spread out across the area near the mountain hut, and it was funny to watch the men in orange (it turns out they were from the Ministry of Environment) run around shepherding all the birds.
These birds are part of a breeding plan, where their nests are protected by a cage at night, and then allowed to free roam (with supervision) during the day.
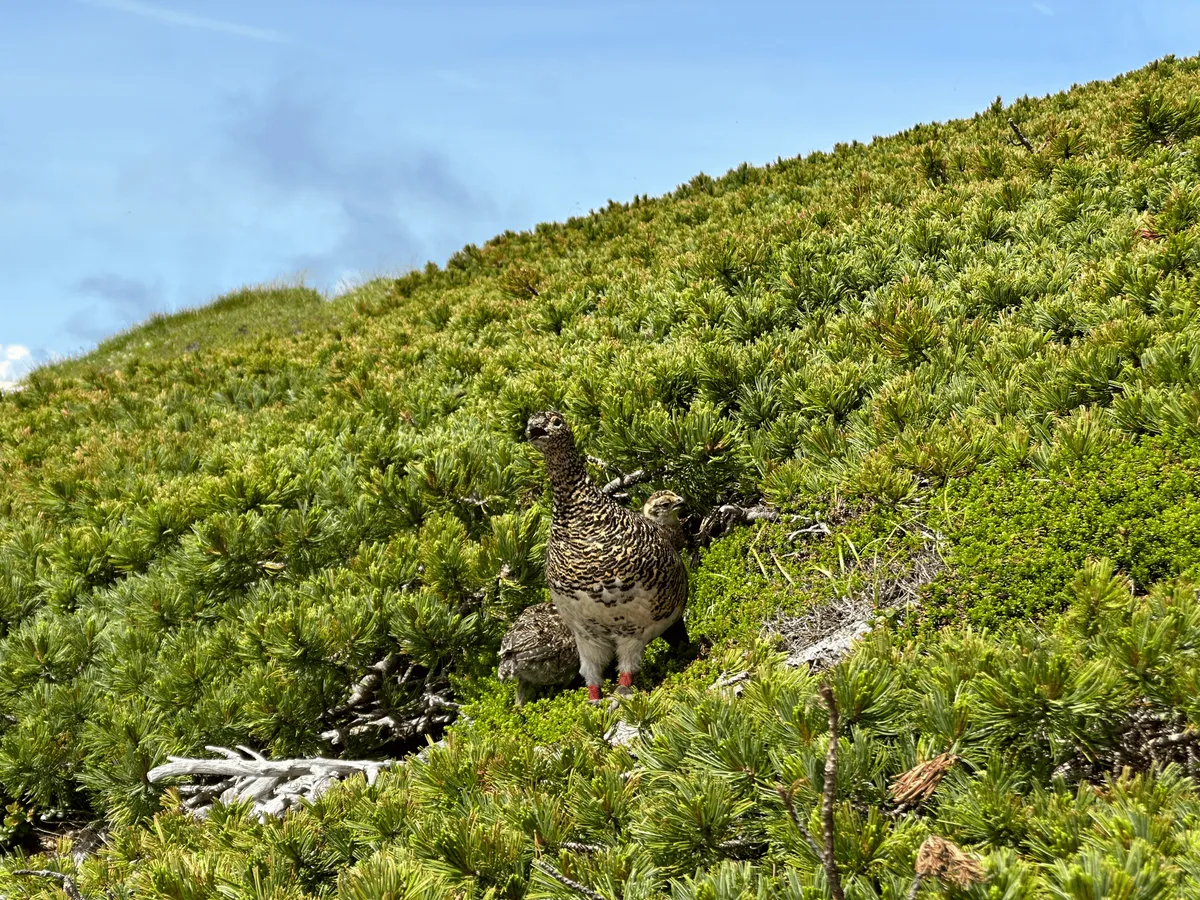
Raichou are classified as endangered in Japan, and although they still live in the Northern Alps, they were extinct for more than 50 years in the Central Alps. As recently as 2020 they were tried to be introduced back into the Central Alps, but none of the baby chicks survived to adulthood.
This explains why they were being so carefully monitored - even with the supervision, we were told that one of the mums originally had 7 chicks but was now down to only 3.
We were also super lucky in that this is the last day of the breeding program. The chicks were just a month old, and were due to be released into the wild the very next day.
Once we got our fill of photos, we climbed up to the summit of Mt Kisokoma-gatake, which was full of hikers.

From here, if you are taking the shortest course you can retrace your steps back to the ropeway. However I opted for “medium difficulty” loop course instead, which had a distance of under 7km and around 670m of elevation.

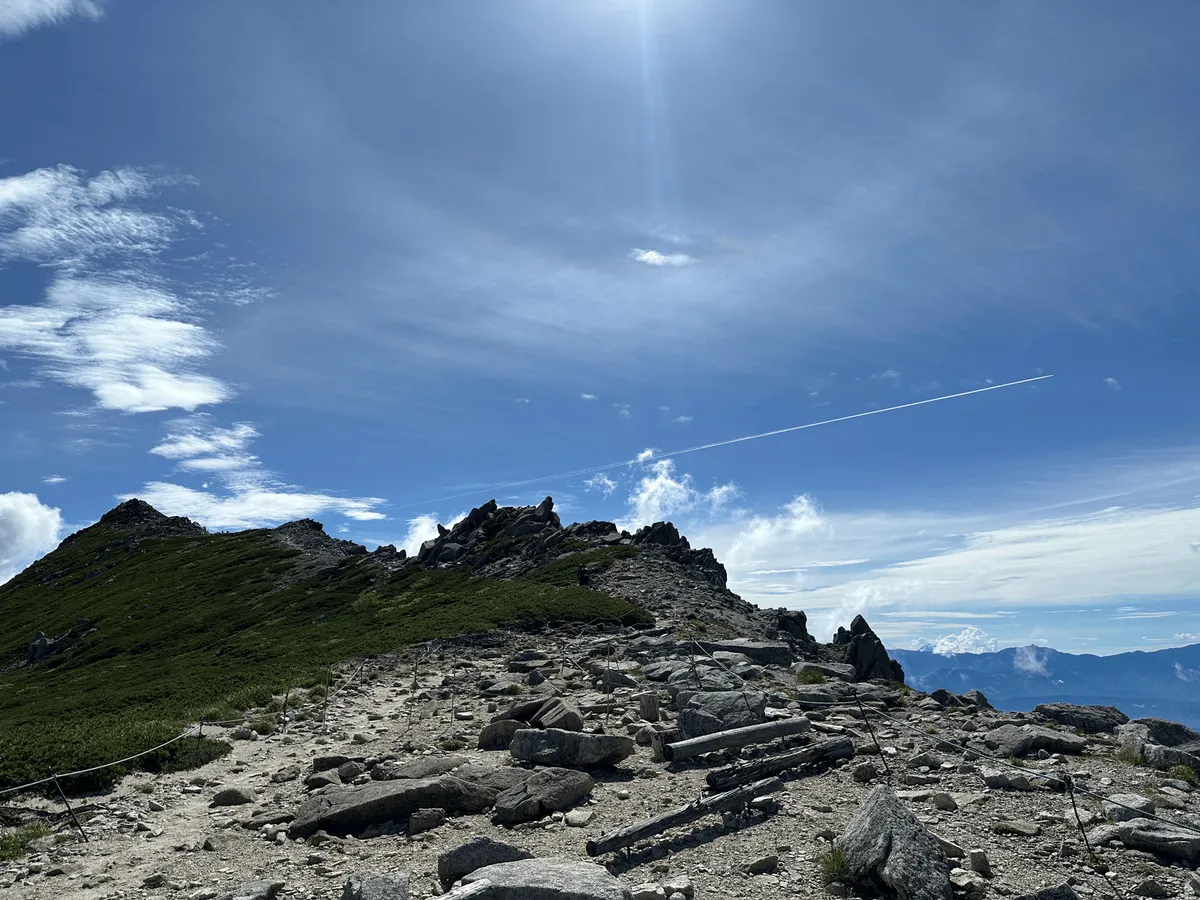
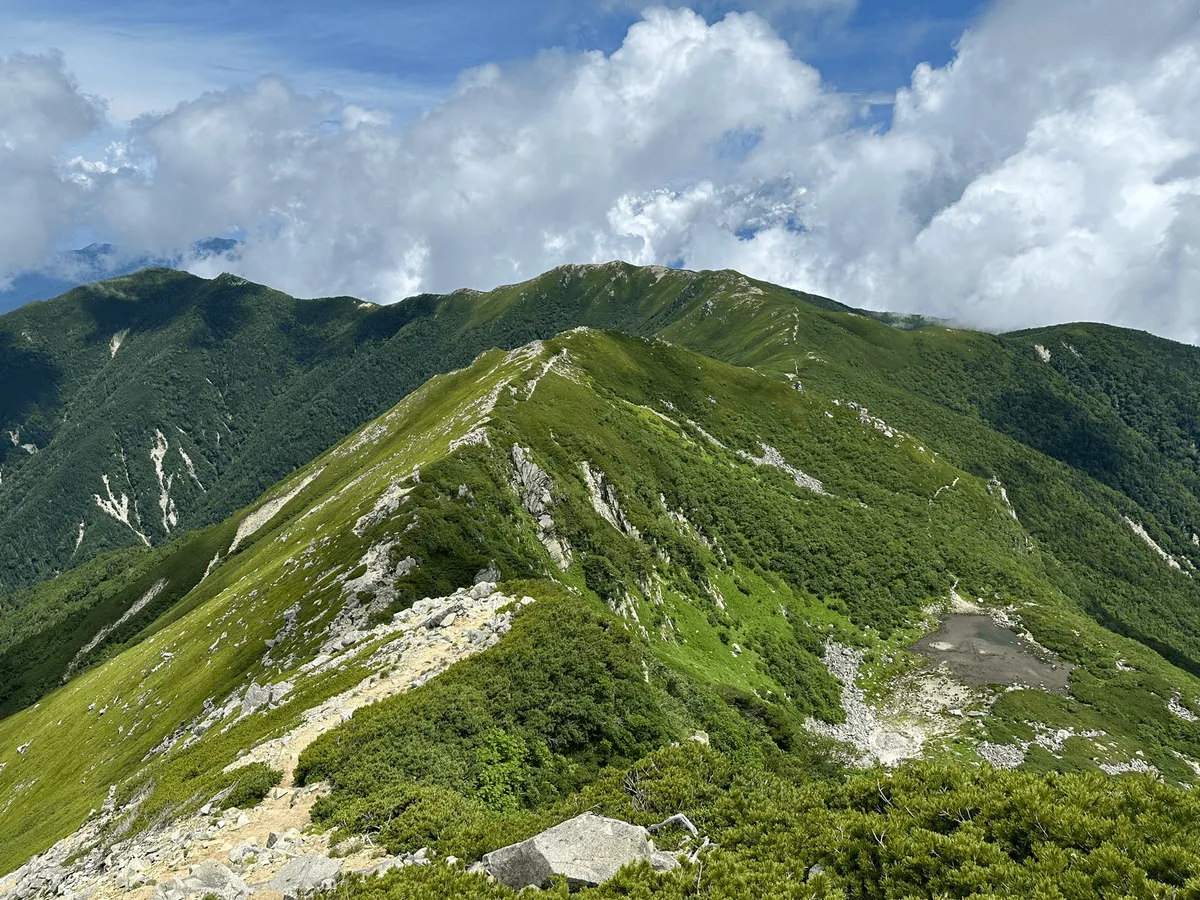
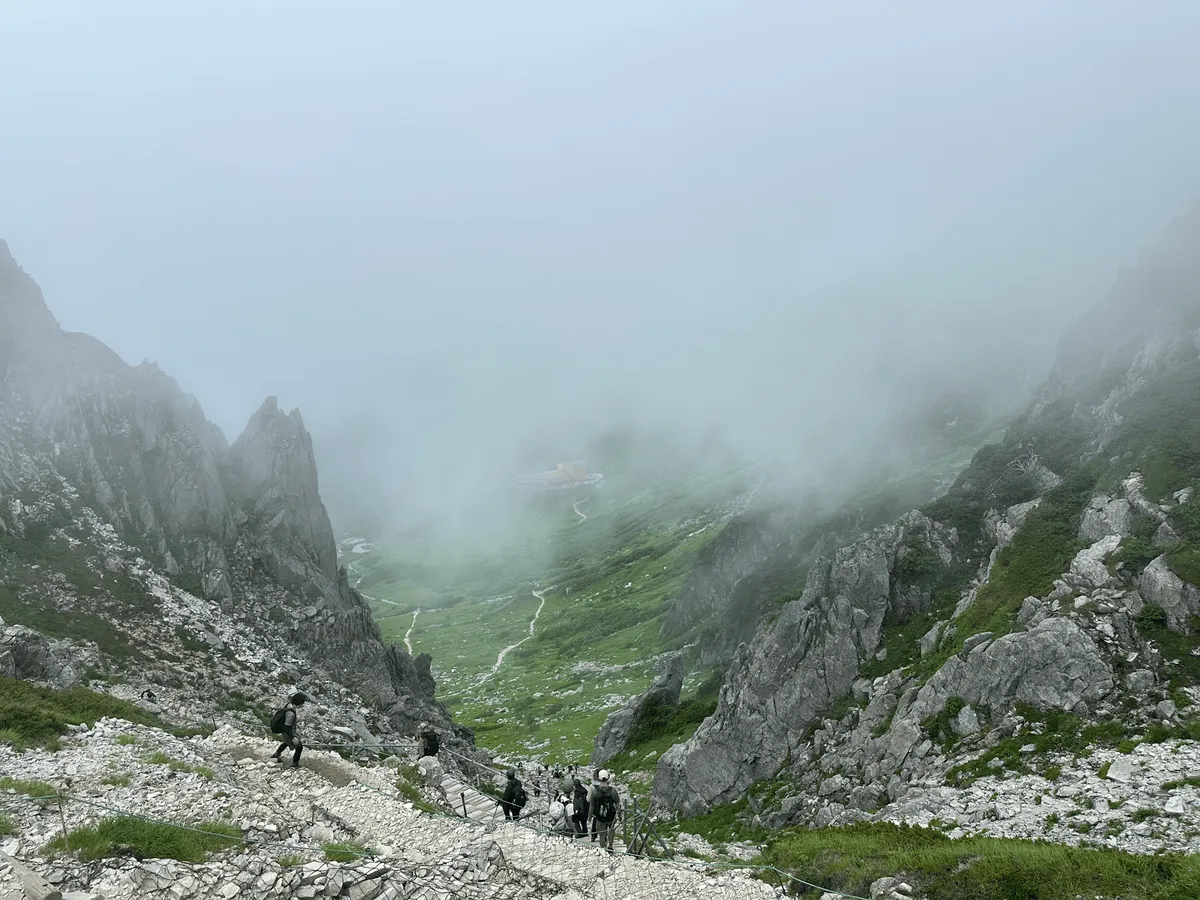
The course from here takes you along an exposed ridgeline, which was quite rocky, and I quickly began to understand why it was marked as “medium” even with its short distance. I love walking long distances over flat terrain, but steep descents over rocks are my kryptonite (I honestly even prefer climbing them) and so this was harder than I expected.

The number of hikers also sharply dropped off once we started this route - I probably saw less than 10% of the numbers I saw on the climb up. I would recommend coming this way if you want to enjoy some quiet alone time in the alps.

This trail is also your opportunity to see real wild raichou. There was one ministry official with binoculars who asked if we had managed to spot any, and apparently there are 5 mums with their chicks (20 total) who are living in this area. Unfortunately we did not get to spot any, but we heard that one of the hikers that came the same way from behind us did spot one walking directly across their path, so it’s definitely a possibility!
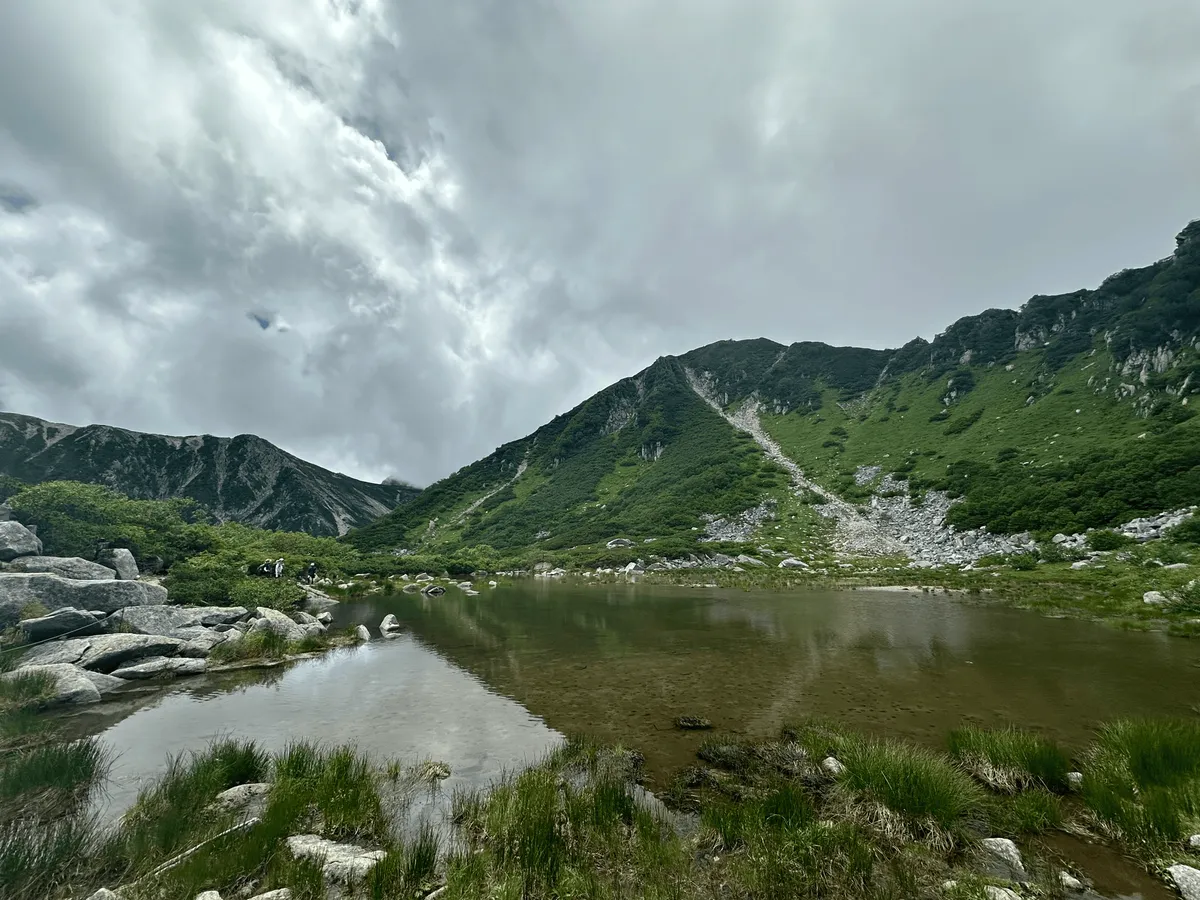
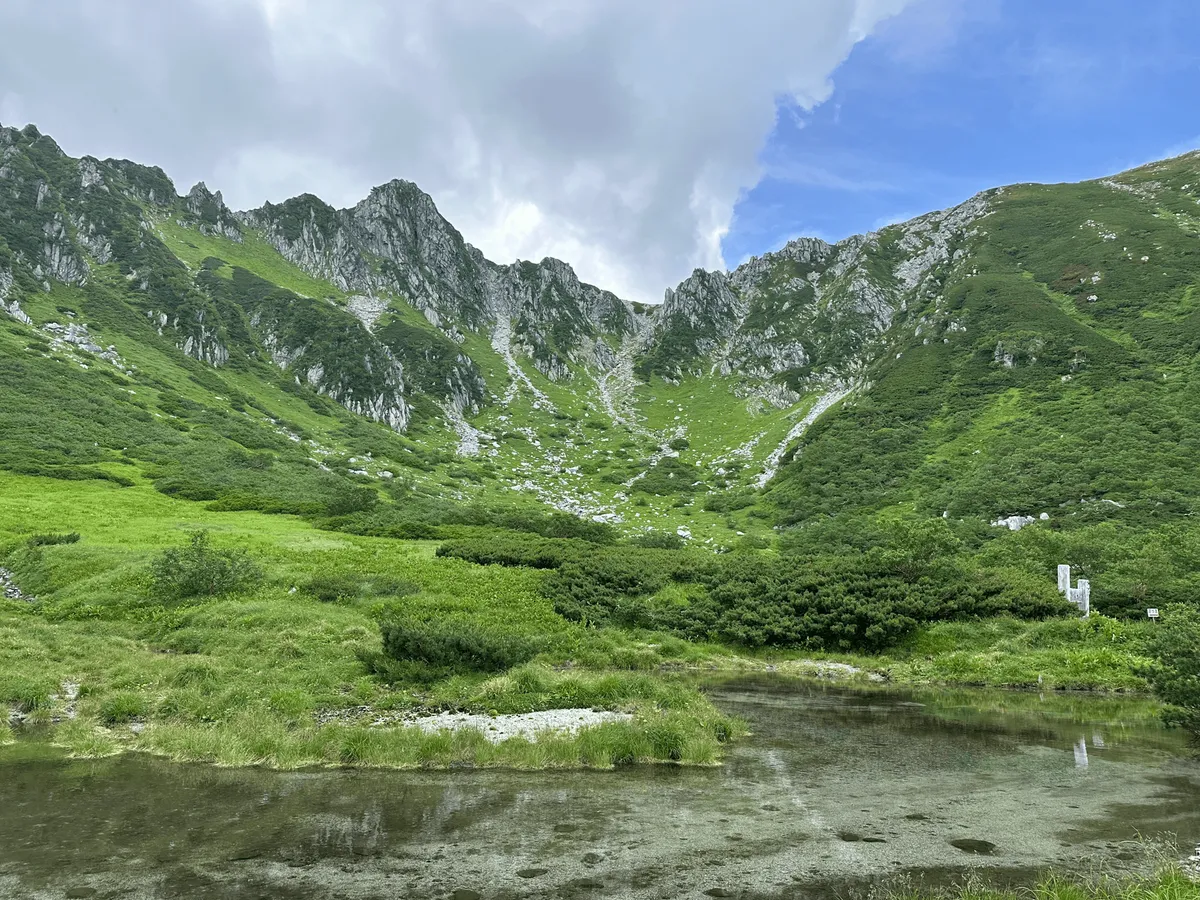
The route takes you down to Lake Nogaike (濃ヶ池, noga-ike), before you climb back up to return to the first mountain hut we passed, Hoken Sanso.


Especially with the summer heat, I did start to regret my choice to go this route partway, and it felt pretty long. Sometimes I do recommend certain courses for the additional scenery that you can’t get on an easier route, but I think if you were tossing up whether to come this way or not, you would still leave satisfied with the beautiful scenery on the shorter course.
As we approached the final climb back up to the mountain hut, some fog rolled in, which helped cool us down as well. Being able to see a goal in the distance raised our spirits, and I started to enjoy myself again.

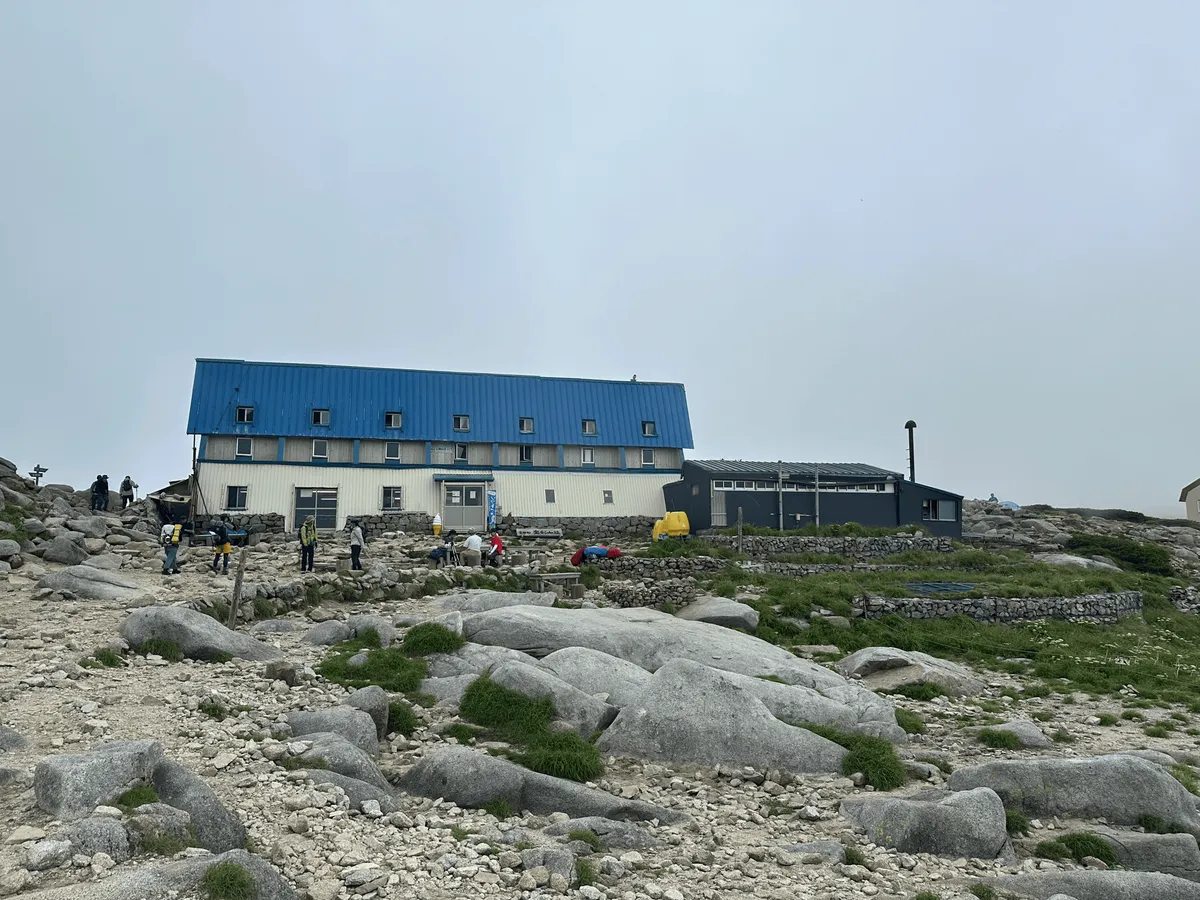
Once we were back to the hut, it was back down the original trail we had climbed.
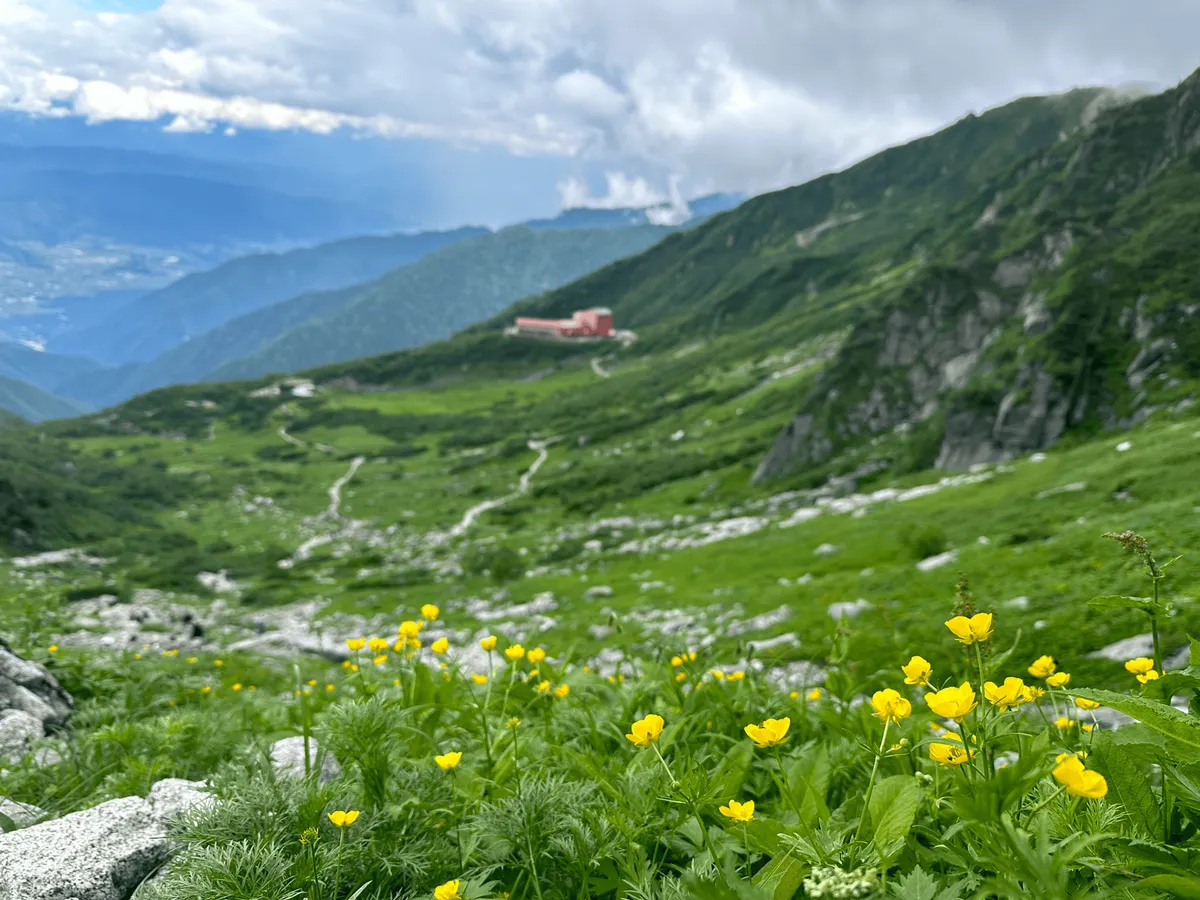
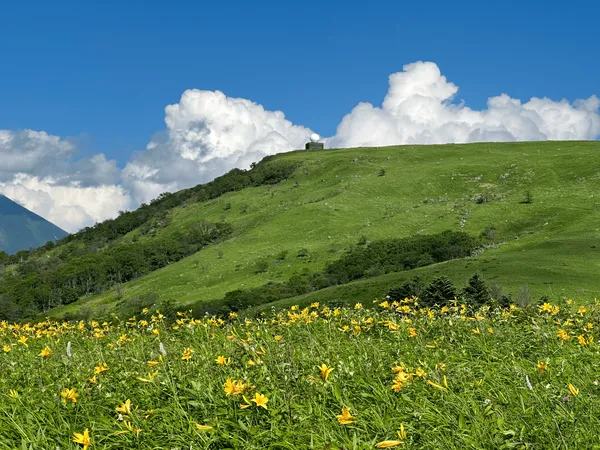
We could see the red building of the ropeway station in the distance, and with the yellow of the flowers it made for a very picturesque sight.
Once we got the ropeway back down, there’s a nice onsen right next to the carpark (Hayataro Onsen Komakusa-no-yu), so we stopped there for a quick soak to get all the sweat off, before setting off for home. With the early start and the heat, I was pretty exhausted so was glad to be able to share the driving duties with my partner.
Hiking course details
| Date climbed | Length | Course time |
|---|---|---|
| 2024-07-27 | 6.6km | 5h15min (the expected time for an average hiker without breaks) |
This course is a loop course that starts at the ropeway station, takes you up to Hoken Sanso (宝剣山荘), the peak Mt Kisokoma-gatake, onwards to Lake Nogaike (濃ヶ池), and then loops back to Hoken Sanso.
There are free toilets available at the ropeway stations, as well as a paid one at Hoken Sanso.
As well as this 5 hour loop course, there is a shorter 3.5 hour course from the ropeway that takes you out to the summit and back again.
Taking the crowded Central Alps Komagatake Ropeway
From researching this mountain, and looking at recent hikes on YAMAP, this mountain actually can have a huge congestion problem. There can be long lines for the bus to the ropeway, and up to 1 hour wait times to board the ropeway itself.
I think we got pretty lucky on this day - we arrived at the carpark at 6:45am, and when we got off the ropeway it was just after 8am. Similarly on the way back down, we arrived at the ropeway at 2:30pm, and were back down to the carpark at about 4:00pm.
However just to be on the safe side, I would recommend factoring in longer wait times into your hiking plans, or coming on a weekday if possible. As Mt Kisokoma-gatake is not too long of a hike, even if you start your hike quite late you should have plenty of time to reach the summit and come back down, especially if you take the beginner course.
The fares for the ropeway will vary depending on time of year, and if you happen to be a tourist visiting Japan, you can also get a 10% discount on the ropeway tickets if you bring along your passport.
Public transportation access with example schedule
Mt Kisokoma-gatake is quite far, but is still accessible as a daytrip hike from Tokyo if you take the shortest 3.5 hour course. You will need to take the highway bus from the Shinjuku bus terminal or “busta”, and then onto a local bus to reach the ropeway station.
| Time | Location | Transport | Cost | Notes |
|---|---|---|---|---|
| 06:55 | Shinjuku Busta (新宿バスタ) | Highway bus | 4400 | |
| 10:18 | Komagane interchange (駒ヶ根インター) | |||
| 10:37 | Nyota-iriguchi (女体入口) | Bus | 960 | |
| 11:16 | Shirabi-daira station (しらび平駅) | |||
| 11:30 | Shirabi-daira station (しらび平駅) | Ropeway | 3050 | Includes return fare |
| 11:38 | Senjojiki station (千畳敷駅) |
During congested times, the ropeway runs at a higher frequency.
| Time | Location | Transport | Cost | |
|---|---|---|---|---|
| 16:00 | Senjojiki station (千畳敷駅) | Ropeway | ||
| 16:08 | Shirabi-daira station (しらび平駅) | Bus | ||
| 16:20 | Shirabi-daira station (しらび平駅) | 960 | ||
| 17:00 | Nyota-iriguchi (女体入口) | |||
| 17:30 | Komagane interchange (駒ヶ根インター) | Highway bus | 4400 | |
| 20:55 | Shinjuku Busta (新宿バスタ) | |||
| Trip total: | 13770 |
The ropeway can also be accessed via direct bus from Komagane Station (駒ヶ根駅), although the overall trip from Tokyo is an extra hour compared to taking the highway bus. However, it could be a good option to take on the return trip, if you wanted to stop by an onsen before heading home or were worried about missing your highway bus due to the crowds.
Car access details
If you are coming by car, you will need to park your car at the Suganodai Bus Centre (菅の台バスセンター) and then get a bus (830 yen) to the ropeway station. Depending on the time of year, the bus and ropeway timetables are different so I recommend checking the official website.
The bus and ropeway are timetabled to run every half an hour, but it seemed like they were running extra to account for the crowds. From researching this hike, I’ve seen accounts of people showing up at the carpark at 7am and not being able to start their hike until 10am, so I would recommend keeping this in mind.
The main carpark was already full by the time we arrived, but there are overflow carparks that the traffic attendants will direct you to. I got my partner to drop me off and go park the car while I bought the bus and ropeway tickets and got in line for the bus. This saved us a bit of time as well.
Since the highway toll fares are quite pricey, we also made sure to pass the toll gate before 4am, as this gives you a 30% discount. Definitely worth it.
| Car park | Time (from Tokyo) | Round trip cost |
|---|---|---|
| Suganodai Bus Centre (菅の台バスセンター) | 3h20min | ~12500 yen |
The carpark also costs 800 yen for the day.
Leave a comment