Creating a Map component with React using Google Maps and Mapbox
I’ve recently been working on building a page to visualise Japan’s 100 Famous Mountains. Since these mountains are spread out across Japan, what better way than a map? I initially settled on trying out a Google Maps implementation with react-google-map which worked pretty well functionality-wise, although I felt the customisation options weren’t that great.
I then realised that there was a Google Maps competitor called Mapbox which seemed way better, and I ended up replacing my original implementation with that one. I’ll go over the pros and cons of both approaches below.
React map components: What’s out there?
When I googled for a React map component, there were a handful that popped up:
- react-simple-maps looked gorgeous. Unfortunately, its code examples seem to be broken, and the last time it was in active development was in July of 2022.
- React Leaflet which is built on top of a JavaScript mapping library called Leaflet. Not a big fan of the design of this one, it feels a bit dated.
- google-map-react, a Google Maps wrapper. Last time it was in active development was 2022 as well.
- react-google-maps which is a wrapper around Google Maps JavaScript API. Still in active development today.
So from my initial Google, react-google-maps seemed to be the only viable option, and it seemed pretty solid, so that’s what I gave a go first.
Cost of using Google Maps API
So before we even get to rendering a map, the most important question of all - how much will it cost?
The way Google’s pricing system works is that you get $200 a month of free credit, and you get billed for anything on top of that. Looking at their pricing page, $200 will get you around 28,000+ usages of their JavaScript API a month. Loading a page with a map on it counts as 1 API call, and even if the user zooms in and out of the page after that, as long as they don’t refresh, you won’t get charged anymore. So essentially it correlates to page views.
I will probably never reach that sort of page load volume, so this was good enough for me.
The one downside is that you do have to put in your credit card details, and you will have to pay for any amount over $200 so I would keep this mind in case you got an unexpected surge in page traffic.
Using the react-google-maps package
Now I won’t go into a full tutorial of how to get it set up, but here’s a quick code snippet:
import { APIProvider, Map, AdvancedMarker } from '@vis.gl/react-google-maps';

export const GoogleMap = () =>
    <APIProvider apiKey={import.meta.env.MODE === 'development' ? LOCAL_API_KEY : API_KEY} onError={setHasError}>
        <Map
            mapId="map-id-goes-here"
            style={{ width: '100%', height: '500px' }}
            defaultCenter={{ lat: 38.5, lng: 137 }}
            defaultZoom={5}
            gestureHandling={'greedy'}
            zoomControl={true}
            disableDefaultUI={true}
            onClick={() => onMarkerClick(undefined)}
            restriction={{
                latLngBounds: {
                    north: 47.0,
                    south: 27.35,
                    west: 120.28,
                    east: -205.0,
                },
                strictBounds: false,
            }}
            reuseMaps
        >
            {mountains
                .map((mountain) => (
                    <AdvancedMarker
                        onClick={() => onMarkerClick(mountain)}
                        position={mountain.position}
                        title={mountain.name}
                    />
                ))}
        </Map>
    </APIProvider>
With that, you get a very classic Google Maps-looking map:
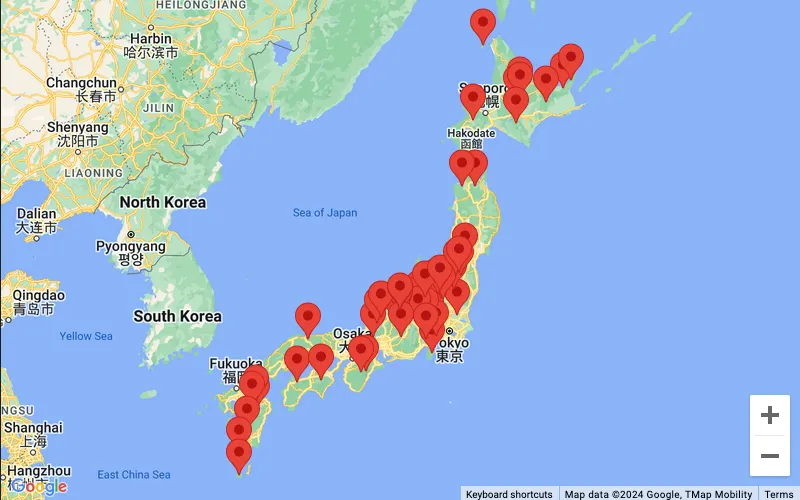
Some key points:
- You’ll need an API key from Google. Since this is all on the client (JavaScript) side, anyone is going to be able to see this API key by inspecting network calls. So you can restrict the API key to only work when called on your website’s domain. I made a second API key that doesn’t have any restrictions on it for testing locally
- Google Maps is split between a “legacy” and “new” implementations. You can use the map without a
mapId, but you’ll be stuck on the legacy version. - Available in the “new” implementation is the Advanced markers, which lets you customise the map marker so it doesn’t have to look like a regular red pin
- Whether you use the “legacy” or “new” version also has implications on map styling which I’ll get into below
In terms of interactivity, I then added some code myself so that clicking on a map would bring up a sidebar with more details about the mountain:
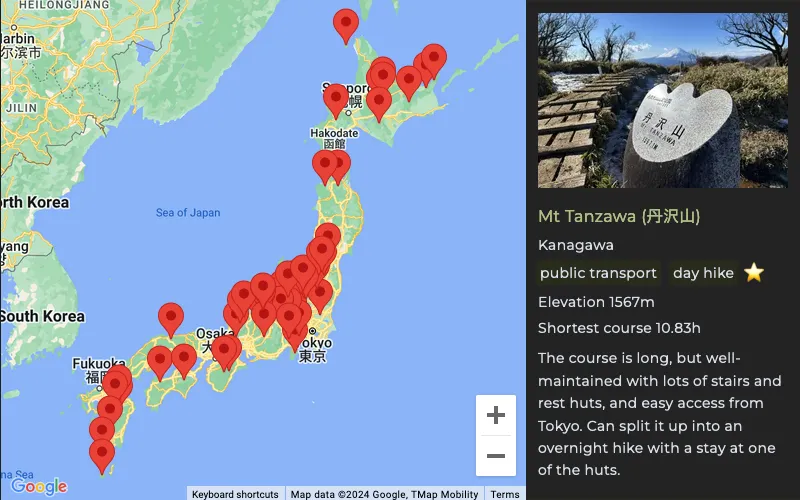
At first, I was looking for options that would display this sidebar inside of the map component, or some sort of component I could re-use for free. There wasn’t really anything that the map component itself provided that looked nice, and it would overlap with stuff like the zoom in/out controls, so instead I just went with some CSS to make the width of the map smaller to compensate for the sidebar popping in.
Side note: Embedding Google Maps on your website
What actually inspired my “map with sidebar” design to begin with was that Google Maps does let you create public maps which you can then embed on your site in an iframe. It comes with a sidebar that pops out if you click on a map marker:
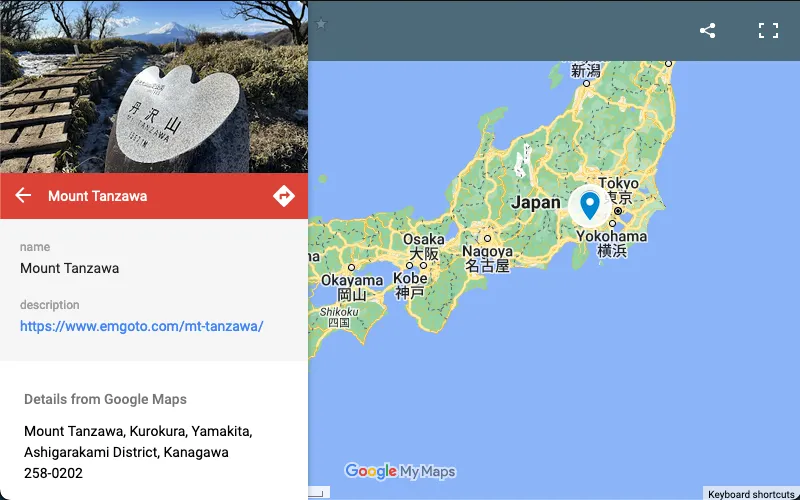
You can put a short description and choose an image to render as well. So if this is all the functionality you need, and you’re happy with the design, maybe going with their out-of-the-box solution is a better approach, especially considering you don’t have to worry about API calls either (it’s all free). I suppose the one downside is that you will have to use the Maps UI to make any changes to the places you have pinned.
Customising the look and feel of your map with react-google-maps
So once I got the basic map rendering, the next thing I wanted to do was make some styling updates. There’s two ways to go about this.
Option 1: Legacy maps
If you aren’t passing in a mapId, you can pass in mapTypeId and styles props directly into the Maps component to set a colour scheme. There’s an example of this in the react-google-maps code. There’s websites like SnazzyMaps which provide a lot of style options for you which you can just copy and paste, which makes it very easy.
You can get funky colour schemes like this, which I thought looked very nice.
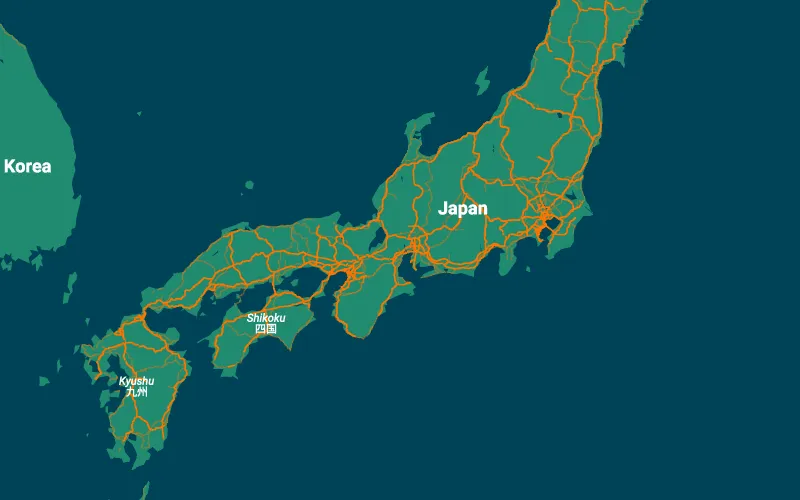
The only downside is that since you are using the older version (with no mapId) you won’t be able to make use of the AdvancedMarkers component.
Option 2: Cloud-based maps
If you are passing in a mapId, any styling changes you have to do it all via the Google Maps Platform UI, which is a bit confusing. First you’ll need to create a map style, before you can then assign it to an existing mapId.
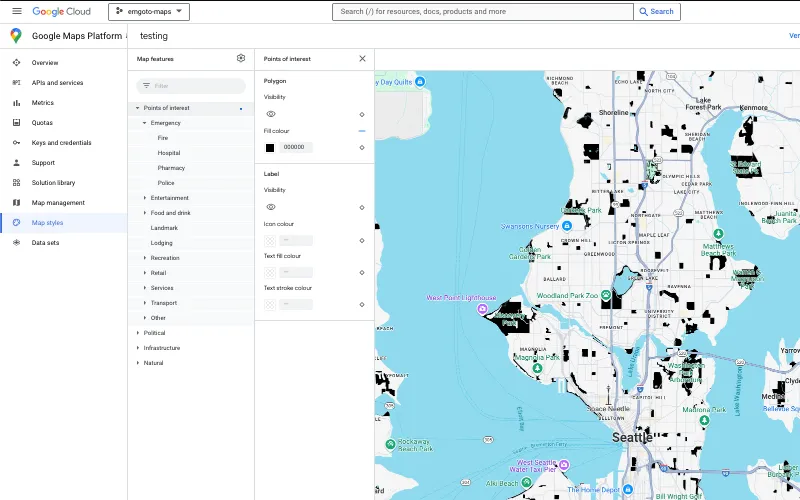
Bizarrely, it doesn’t seem like there is any way to import a map style from somewhere else, which is a real bummer, because it means you have to edit all your styles by hand. I decided this was a non-starter for me.
Trying out Mapbox, a Google Maps competitor
So it was at this point that I realised there was another competitor - Mapbox. Not sure how I missed this to begin with. When I tried to sign up, it turns out that I had an account already, so I had heard of it, but it had completely slipped my mind. They have a nice React tutorial on how to use it directly, as as well as a wrapper package react-map-gl. I decided I may as well give it a go (I’m a bit of a completionist when it comes to these things).
Mapbox gives 50,000 map loads for free, which is nearly double of Google Maps, and my general first impression of it was that as an third-party option it was probably going to have better customisation options than Google.
When load your Mapbox map for the first time, it even shows the entire Earth as a globe. So cute!
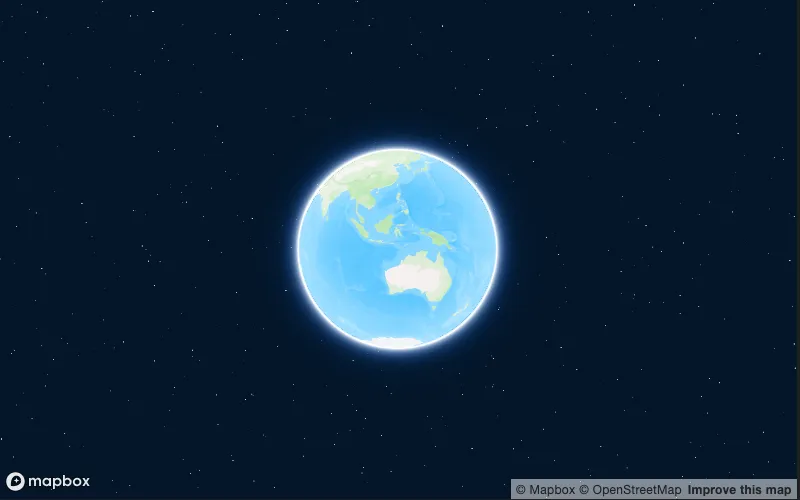
As a quick code example, this is what it took to get similar results to Google Maps:
import { useEffect, useRef } from 'react';
import mapboxgl from 'mapbox-gl'
import 'mapbox-gl/dist/mapbox-gl.css';

export const Mapbox = ({ onMarkerClick }) => {
  const mapRef = useRef();
  const mapContainerRef = useRef();

  useEffect(() => {
    mapboxgl.accessToken = API_KEY;
    mapRef.current = new mapboxgl.Map({
      container: mapContainerRef.current,
      style: 'mapbox://styles/mapbox/outdoors-v12',
      center: [137, 38.5],
      zoom: 4
    });

    mountains.forEach((mountain) => {
      const marker = new mapboxgl.Marker()
        .setLngLat([mountain.lng, mountain.lat])
        .addTo(mapRef.current);

      marker.getElement().addEventListener('click', () =>
        onMarkerClick(mountain));
    });

    return () => {
      mapRef.current && mapRef.current.remove()
    }
  }, [])

  return (
    <div
      style={{ width: '100%', height: '500px' }}
      ref={mapContainerRef}
    />
  );
}
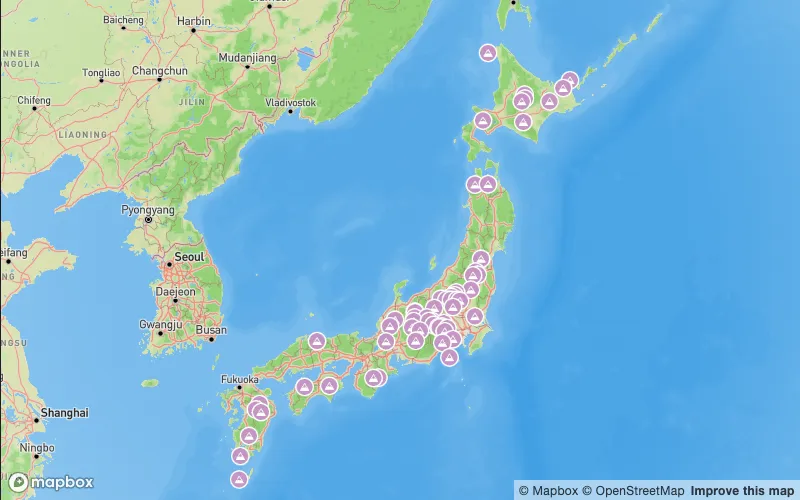
This gives a map that looks like this, using one of their default style options called “Outdoors”:
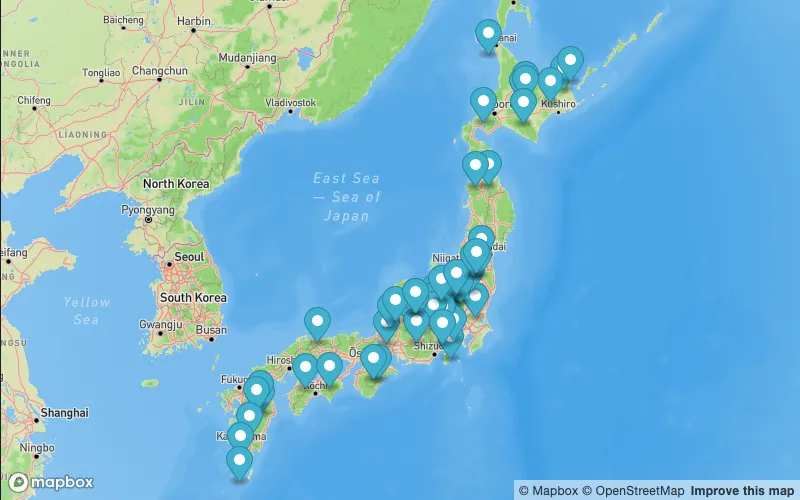
However this was noticeably laggier than Google Maps.
Mabox: using layers instead of markers
After Googling, it seemed like using layers instead of markers should improve performance so I decided to try that out. I used one of their code examples. This helped, although it makes the code a lot more hectic:
useEffect(() => {
  // ...
  mapRef.current.on('style.load', () => {
    mapRef.current.addSource('places', {
      type: 'geojson',
      data: {
        type: 'FeatureCollection',
        features: mountains.map(mountain => ({
          id: mountain.name,
          type: 'Feature',
          properties: {
            description: mountain.name,
          },
          geometry: {
            type: 'Point',
            coordinates: [mountain.lng, mountain.lat]
          }
        }))
      }
    });

    mapRef.current.addLayer({
      id: 'places',
      type: 'symbol',
      source: 'places',
      layout: {
        'icon-image': 'mountain',
      },
    });

    mapRef.current.on('click', 'places', (e) => {
      const clickedMountain = mountains.find(
        (mountain) => mountain.name === e.features[0].properties.description
      );
      onMarkerClick(clickedMountain);
    });

    mapRef.current.on('mouseenter', 'places', () => {
      mapRef.current.getCanvas().style.cursor = 'pointer';
    });

    mapRef.current.on('mouseleave', 'places', () => {
      mapRef.current.getCanvas().style.cursor = '';
    });
  });

  return () => {
    mapRef.current && mapRef.current.remove()
  }
}, []);
Modifying the default map layers
Maybe it was because I was using their “Outdoors” style, but it was actually a lot better at rendering icons for mountains and stuff on the map for you. This is what I had, even before I rendered my own markers:
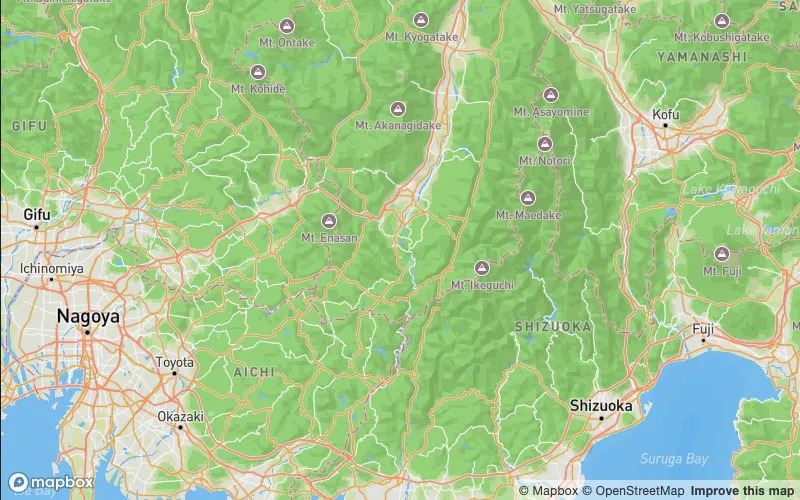
However at the same time, these mountains were going to interfere with the mountain markers I wanted to render - users wouldn’t know which ones were mine and which were rendered automatically by the map. So I knew I had to edit the map style.
Similar to Google, they have a UI called Mapbox Studio for editing styles.
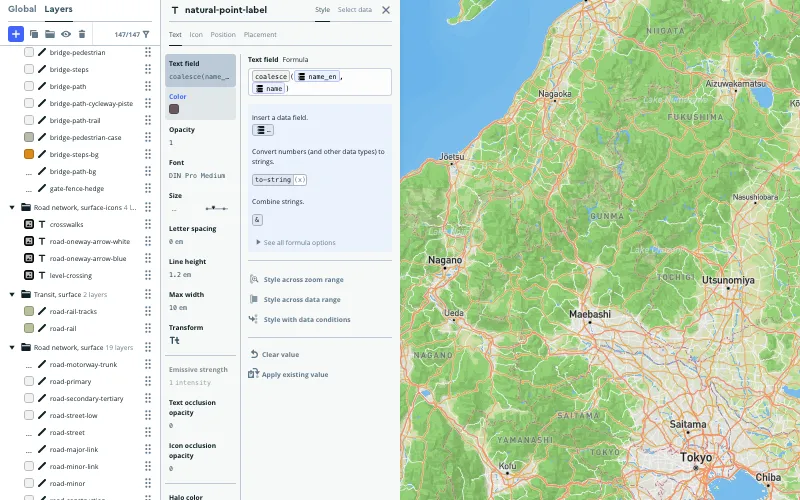
It did feel a lot more intuitive and useful to me than the Google version. I couldn’t see it in the UI, but if you go to https://studio.mapbox.com/styles/add-style/mapbox/outdoors-v12/ it will automatically duplicate the outdoors style and save it to your studio. From here you can do stuff like hide certain layers.
Custom icons with Mapbox
Next up was fixing the icons. I was using the default mountain icon which had an ugly brown tinge to it. It seems like the icons you get out of the box are based off of the Maki icon set. They provide an icon editor too so you can edit the colours of these default icons. You can download your edited icons as SVGs, and then upload them to your Mapbox style via the Studio UI.
I found that uploading and updating the icons was super slow (or wasn’t happening at all?) so my workflow was to upload the new icons, and then duplicate the style to a completely new one, and update the ID prop I was passing in in my map component.
Changing the icon colour when clicking on it
This one was kind of a pain, and not as straightforward as you think. Apparently you have to create two layers - one with the icons in its original colour, and a second layer that’s hidden, with a different coloured set of icons. Then when you click an icon, it reveals the hidden icon that was on another layer.
I’ve been experimenting with the AI editor Cursor lately, and by giving it that Stackoverflow link and asking it to implement that for me, it was actual able to (mostly) do it, which was neat.
Now my mountain icons are purple!

Mapbox vs Google Maps?
I do think Mapbox is the better solution over Google Maps, even just with the free usage tier alone. The Studio is pretty easy to use, and I get the sense I’m going to be able to more easily do customisations going forward. Actually, the American hiking app Alltrails and even Japanes hiking app YAMAP use Mapbox as well, so I’m in good company. My only regret is not realising this before doing it all in Google Maps to begin with!
My implementation is still pretty basic - but in the future I would like to add some filter options, or maybe colour code the mountain icons depending on what region they are in, or by difficulty.